‏إظهار الرسائل ذات التسميات Android. إظهار كافة الرسائل

الأربعاء، 24 أغسطس 2016

13 different vision of Android you need to know

Bismillahi...

there are 11 different vision of android suffer but must of the android users are not aware of all the names of the visions. The version history of the android mobile operation  began with the release of the Android alpha  in November 2007. The first commercial version, Android 1.0, was released in September 2008. Android is continually developed by google and the Open Handset Alliance (OHA), and has seen a number of updates to its base operating system since the initial release.


Versions 1.0 and 1.1 were not released under specific code names, but since April 2009's Android 1.5 "Cupcake", Android versions have had confectionery-themed code names. Each is in alphabetical order, with the most recent being Android 7.0 "Nougat", released in August 2016. Now we have 11 different vision of android. see it in image below and their date of released.


As you can see in the above screeen snap. we have;

  1.          1.0     (It has no name)                                              Feb 2001
  2.           1.1    (Has no name also)                                          Feb 2009.
  3.           Donut                                 1.6                                Sept 2009
  4.           Eclair                                 2.0 - 2.1                         Oct 2009 
  5.           Froyo                                 2.2 - 2.2.3                         May 
  6.           Ginger Bread                   2.3 - 2.3.7.6                       Dec 2010
  7.          Honeycomb                      3.0 - 3.2.6                            Feb 2011
  8.           Ice cream sandwich         4.0 - 4.0.4                         Oct 2011
  9.           Jelly Bean                         4.1 - 4.3.1.9                 July 2012
  10.          KitKat                               4.4 - 4.4.4                           Oct 2013
  11.          Lollipop                              5.0 - 5.1.1                         Nov 2014
  12.         Marshmallow                          6.0 - 6.0.5                Oct 2015
  13.         Nougat 7.0                                       22 Aug 2016
 ALHAMDULILLAHI..
WHATSAPP US ON 07035311650

الخميس، 18 أغسطس 2016

How to Install XOS Chameleon V.2.0 on Infinix Zero 3 and Note 2 LTE

Good news to Infinix Zero 3 and Note 2 LTE users, you can now upgrade your smartphone to XOS interface. The XOS user interface is the latest infinix customized XUI called XOS Chameleon V2.0.0. 
 
By the power vested in XOS, its users can enjoy more features, like the 3 fingers screenshot which enables you to take screenshots simply by swiping 3 fingers across your screen. You no longer have to go through the volume and power button process anymore.
Infinix Zero 3 and Note 2 LTE users are already receiving OTA update. However, if you miss it, you can still download it through other means (below) and install it via your SDcard.
Take Note of The Below Instruction Before Upgrading» Make sure your infinix device is not rooted. If it is, kindly http://pinkberrylicious.blogspot.com /2014/09/simple-method-to-unroot-any-rooted.html">unroot it.
» Check your built number and download according to your phone built number.
Infinix Zero 3 Smartphone


» Zero 3 X552-H952-A1 - Download SDcard, SP flash

» Zero 3 X552-H952-B1 - Download SDcard, SP flash
Infinix Note 2 LTE Smartphone
» Note 2 Lte X600 A1 Build: (SDcard, SP Flash)
» Note 2 Lte X600 B1 Build: (SDcard, SP Flash)
The instruction below will explain only the methods to install this interface Via SD card.
Install update using OTA package or TCard package
To Install Via SDcard
» I believed you had downloaded the relevant OTA package or TCard package
» Extract it and place the 'update.zip' to the root of your SD Card (if already extracted, rename it as 'update.zip' wink
» Now, navigate to settings » About phone » System update » Options » Update from local » Select 'update.zip' and install it.

The upgrade process will begin at this point. Just wait until the installation is complete, then the device would be rebooted (automatically). Don't do anything.

You can also install it by following this other step:
» Turn off your Infinix Smartphone, and boot into recovery mode by:
» Switching off your phone, then press and hold volume up button + power button.
» If you see Android boot with a danger sign, press and hold power button again and press volume up button once.
» Use volume up / down button to select "Apply update from SD card"
» Now scroll to where the 'update.zip' file is located and select with the Power Button.

The upgrade process will begin at this point. Just wait until the installation is complete, then the device would be rebooted (automatically). Don't do anything, if you don't want your phone to enter one-chance.
Don't just read and go, kindly use any of the share buttons below and don't forget to drop your comment. Thanks

الأحد، 14 أغسطس 2016

Coming Soon Device - Infinix Note 3 Pro X537

Infinixmobility is set to release the second version of Infinix Note 3 called Note 3 Pro with the model number X537, while the http://pinkberrylicious.blogspot.com /2016/07/coming-soon-device-see-picture-of.html">other version is X601. 

Hope you remember the post published on this blog " http://pinkberrylicious.blogspot.com /2016/08/infinix-note-3-x601-check-out-more.html">Infinix Note 3 X601 - Check Out More Exclusive Pictures and The Full Specifications"? In which we stated there that Infinix Note 3 will be available in two variants.

Well, it is no more rumor, it is confirmed!
You won’t notice any physical difference between the Infinix Note 3 and Note 3 Pro, but there is much difference in the specifications.

Key Features of Note 3 Pro:
  • Full metal body
  • Helio X10 MT6795
  • Android 6.0 Marshmallow with XOS
  • Fingerprint sensor
  • 6.0 inches with FHD IPS 1920 x 1080 display
  • 4500mAh battery with flash charging
  • 3GB RAM + 32GB storage
  • 16MP back + 8MP front camera with flash for both
You can check out that of http://pinkberrylicious.blogspot.com /2016/08/infinix-note-3-x601-check-out-more.html">Note 3 specification here.

The device will be bast the market first in Kenya before coming to other countries. And to endorse this, Infinix Note 3 is now available for Pre-Order on Jumia Kenya

The launch date of the device is still likely to be this August. The price of the devices is yet to be confirmed. Stay updated and connected to the actual release date, full specification and its price.

How to Fix/Unbrick A Dead MTK Android Smartphone

Smartphones have clearly transformed the lives of many across the world. They offer so much in one small package, making them a must-have for millions of people. You can do nearly everything on a smartphone, and that is truly remarkable. Bricking a device like this can be an extremely frustrating experience.

Basically, phone get bricked during the installation of Android OS (flashing).  If flashing is interrupted by the low battery or loose cable connection during flashing.

If your android phone has been powered by Mediatek CPU and either you are using the wrong firmware or a custom ROM (unstable) to flash your phone, your android mobile will get dead and this post is about how to recover MTK Android Smartphone if it has gone Dead. The method is for those whose their device refused to come up after interrupting the flashing process while using http://pinkberrylicious.blogspot.com /2015/09/how-to-flash-mediatek-stock-roms-with.html">SP Flash Tool.

Steps to Fix/Unbrick MTK Dead Android Smartphones
Smartphones like Tecno, Infinix, Innjoo, Gionee and other most Chinese phone are MTK Devices.
You can also detect your MTK phone when you install mobile uncle, under engineering tab, if its MTK device you will have IMEI in engineering option available. To fix/unbrick your MTK Dead Android Smartphones, follow these steps below;

» Connect your phone to a computer (via a USB cord) for charging or to any power source around your environment.  It could take up to two hours  or more, but if the phone have successfully revived back, you will see 1℅ or 2%. Just leave it to keep charging before powering it up.

You Can Also Speed Things up by Doing The Below:
» Kindly remove the battery of the dead or brick phone.
» After that, connect the phone to a charger without battery inside.
» Slot in the battery while the phone is still connected to the charger.
» You could also keep pressing the Volume up + Power button while the device is charging.

Or

» Remove and boost the battery using a desktop or an external charger then resume internal charging.
» After that, uninstall then re-install MTK vcom drivers you have earlier on installed on your PC/desktop computer.

You should be able to fix/revive back your bricked MTK Smartphone with any of the above methods.

Hope this info helps? Ask your question and feel free to share this post with your friends using the Share/Like buttons.

الاثنين، 1 أغسطس 2016

Infinix Note 3 X601 - Check Out More Exclusive Pictures and The Full Specifications

It's no longer news that Infinixmobility is currently working on another powerful device named Infinix Note 3 x601. The upcoming Infinix Note 3 will be the successor of the former http://pinkberrylicious.blogspot.com /2015/12/infinix-note-2-x600-now-available-for.html">Infinix Note 2 device and it has a lot in common with the newly launched http://pinkberrylicious.blogspot.com /2016/07/infinix-hot-s-x521-now-available-for.html">Infinix Hot S.

I had already published a few information and the leaked image http://pinkberrylicious.blogspot.com /2016/07/coming-soon-device-see-picture-of.html">regarding the infinix Note 3, but now, we have got more information for you.

Infinix Note 3 x601 will come re-loaded with Android 6.0 out of the box with Infinix very own XOS UI, , also featuring a 6.0 inch display screen.

Just as the new http://pinkberrylicious.blogspot.com /2016/07/infinix-hot-s-x521-now-available-for.html">Infinix Hot S, the forthcoming Note 3 will be retaining same fingerprint scanner, full metal unibody and dual_LED flash to support the camera with brighter luminance, thus giving the smartphone a premium feel. 
  
Key Features:
  • Full metal body
  • Android 6.0 Marshmallow with XOS
  • Fingerprint sensor
  • 6.0 inches with FHD IPS 1920 x 1080 display
  • 4500mAh battery with flash charging
The Infinix Note 3 will be available in two variants and the difference between both are quite much.
The 1st Infinix Note 3 variant:
  • Helio X10 MT6795 chipset
  • 3 GB RAM
  • 32 GB internal storage (expandable to up to 2 TB via SD card)
  • 16 MP back camera with dual LED flash
  • 8 MP front camera with soft flash
The 2nd Infinix Note 3 Variant:
  • MediaTek MT6573 chipset
  • 2 GB RAM
  • 16 GB internal storage (expandable to up to 2 TB via SD card
  • 13 MP back camera with dual LED flash
  • 5 MP front camera with soft flash
The Infinix Note 3 is expected to be launched in August 2016. Stay updated and connected to the actual release date and its price.

We also heard that the Infinix Zero 4 and Hot 4 are also around the corner. 

الاثنين، 25 يوليو 2016

Method to Use SD Card as Default Internal Android Storage on Android 6.0 Marshmallow

Using the external SD card as internal storage is one of the most wonderful features on http://pinkberrylicious.blogspot.com /2016/04/android-60-marshmallow-now-available.html">Android 6.0 Marshmallow. No more complaining of insufficient memory, low storage issue or running out of space, once you have enough space on your external SD card.

This process will completely shift the app storage burden on internal storage to the SD card, the system will secure and adopt the SD card as its own and hence lift all restrictions as to access from apps.

The instruction below will solve your smartphones low storage issue as it allows the system to install apps on SD card directly (once adopted as internal), even with complete data and obb files. Carefully follow the steps below to get it done.

Note: Original SD card is required, otherwise it won't last long on the device. If you are using the old Micro SD card, make sure you backup all your files and documents.
To Use SD Card As Default Internal Storage on Android 6.0
1. Switch OFF your smartphone >> insert the original SD card you wish to use as internal storage >> Turn it ON again. You should get a notification - "New SD card detected", double-click the notification.
2. Tick Use as internal storage, then click on Next
3. Before you proceed, remember to back up all your files in a safe place (Save your files/documents on your PC or use another SD card).
4. Now, click Erase & Format (wait while the SD card getting formatted).

5. Tick Move now or Move later depending on when you wish to move media files from the internal storage to the newly prepared SD card.
6. Click Done and reboot your device.
 
You are done, your SD card will now perform the function of internal memory. Any app you download from any source will be automatically installed into your SD card as default memory.

The process will make your SD card secure and ties it to your smartphone only. Once you format your external SD card as an internal storage on Android 6.0 Marshmallow, it can only be used in the same device then. To use it on other devices, a format will be required, which ensures the safety of your data on the SD card.

الخميس، 21 يوليو 2016

Coming Soon Device - See The Picture of Infinix Note 3 X601

Infinixmobility is already on course to uncover another powerful device named Infinix Note 3, which is a technically upgraded version of the Infinix Note 2. While we are still lying in wait for http://pinkberrylicious.blogspot.com /2016/07/infinix-hot-s-x521-coming-with-3gb-ram.html">Infinix Hot S, the picture of Infinix Note 3 (Infinix X601) has come into view. This means that the Note 3 is also moving closer.
 
Those who are using Infinix Note 2 (X600) can testify that the device is blow one's mind, but the forthcoming Infinix Note 3 has shown to be much better than its predecessor, based on the information and the leaked images we’ve seen.
 
The Note 3 will also feature fingerprint scanner and all metal body just like Hot S. Based on the leaked image, Note 3 will show up with 5.5 screen size, contrary to its predecessor which has a 6″inch screen. Guessing that the device might likely come with 3GB Ram and 4000mAh battery capacity.
 
We heard that the Infinix Zero 4 is also around the corner. Right now, we don’t have proof on how Zero 4 will look like, but I will update you as soon as we gather more information about it.
 
It is too early to be sure about anything on Infinix Note 3, just take everything with a pinch of salt. The real images and specifications of the Note 3 and zero 4 will be communicated to you as soon as we get the naked truth.

الأحد، 10 يوليو 2016

Download Stock Rom / Firmware For Any Android Device

If you need stock rom / firmware for your Android device, select below and download the exact firmware that suits your SmartPhone. Required tool / software for flashing stock firmware packages of any device listed below and the appropriate flashing guide is included in the firmware download page.

Leakite Android Blog is doing its best to provide stock roms / firmware download links and http://pinkberrylicious.blogspot.com /2016/03/easy-mtk-firmware-flashing-installation.html">flashing guide for all Android devices to help SmartPhone consumers and Technicians fix bricked devices and build custom roms, kernels / recoveries, etc. But this cannot be achieved without your support.

The support required of you is to reach out to Leakite Admin via the comment section at the end of this post, or our http://pinkberrylicious.blogspot.com /p/contact-us.html">contact form, or even the http://pinkberrylicious.blogspot.com /p/request.html">request page to inform of us about other brands and phone stock roms / firmware you will want added to the list below.

You can also request for http://pinkberrylicious.blogspot.com /p/custom-roms.html">custom roms, custom recovery, http://pinkberrylicious.blogspot.com /2016/04/universal-adb-and-fastboot-driver.html">drivers, http://pinkberrylicious.blogspot.com /p/rooting.html">rooting, or seek help for any problems you might be having on your Android Smartphone and we will do our best to assist you resolve it.

Choose device to download firmware below..


If your device is not on the list above, please inform me via the comment section below so it will be included ASAP.


الجمعة، 8 يوليو 2016

No Signal After Selecting 3G Only? Fix Now

Sometimes you get 'no signal' on your Android device after setting Network Mode to 3G Only. The funny thing about this issue is that you usually don't get to understand entirely how this problem came about.

Well, I'll tell you one very common cause of this problem: IMEI/NVRAM tweaking.

Having modified my Mediatek device's IMEI number countless times due to http://pinkberrylicious.blogspot.com /2016/04/how-to-change-modify-of-fix-null-imei.html" target="_blank">null IMEI, caused by flashing incompatible or corrupt custom files- my device got this problem. Luckily for me, I already made a stock backup of my device's NVRAM.

Fixing no signal in 3G only network mode

Requirements
  1. MTK Droid Tools - Download
  2. Faulty Mediatek (MTK) Device (of course)

If you already have a backup of your phone's IMEI/NVRAM, follow the guide below to fix. If not, read further downwards.

Step One: Unpack downloaded Mtk Droid Tools zip to your desktop and launch MTKDroidTools.exe 

Step Two: Enable USB debugging on your phone and connect to Computer. Once Droid Tools detect and load your device details, select IMEI/NVRAM.


Step Three: From the popup display, click Restore 


Step Four: You will be requested to select the .bin NVRAM backup of your phone. Navigate to the folder where it is located and select it.


Step Five: After selecting the .bin file, you will be prompt with another popup to select .tar. Select the file and continue


Done. Now reboot your device.

Step Six: Go to Settings > More... > Mobile networks > Network Mode and select 3G only.

Yeah! It's that easy.


If you don't already have an IMEI/NVRAM backup of your phone, you will have to make a backup from some other phone. It must be the same device as yours, else you'll end up bricking your phone and that would entirely be your fault. You've been warned.

Connect the good phone to your computer and follow the instructions above, but instead of selecting Restore as instructed in Step Three, select Backup.


Once backup is complete, connect the faulty phone to computer and Restore backup as per instructions above. On completion of the restore process, reboot your phone. Done.

To return your phone's default IMEI number, http://pinkberrylicious.blogspot.com /2016/04/how-to-change-modify-of-fix-null-imei.html" target="_blank">click here.

Got questions? Use comment box below...

Don't forget to share this post with friends.

الجمعة، 1 يوليو 2016

Collection Of All Alcatel Android Firmware Files


This post contains a comprehensive list of all Alcatel Android smartphones stock firmware files. Select your device-suitable firmware from list below to download and flash on your device.


  • Alcatel One Touch 6012X Idol Mini  - Download
  • Alcatel One Touch 6012D Idol Mini  - Download
  • Alcatel One Touch Pop C1 4015X  - Download
  • Alcatel One Touch Pop C3 4033X - Download (pass: thefirmwarehub) - 
  • Alcatel One Touch Pop C7 7040E - Download  (pass: thefirmwarehub) - 
  • Alcatel One Touch Pop C9 7047D - Download

More to come...

Google Announced That Android 7.0 Will Officially be Known as Nougat

Google has announced the next version of its Android mobile operating system is Nougat. Android Nougat will be version 7.0. Nougat is the nickname of the new Android OS. Android 7.0 Nougat is the latest and the senior version of Android 6.0.1.

At Google I/O, the company announced that it would be taking suggestions for what to name its next mobile OS. To avoid a Boaty McBoatface issue, Google insisted that it would have the final say no matter what suggestion the Internet favored most.

Among the names posted on Google's Android N website were Nachos, Naan, Nectar, Nut brittle, and more. But Nougat was the winner, joining Marshmallow, Lollipop, KitKat, Ice Cream Sandwich, and all the other sugary Android monikers.

Android Nougat promises to bring you a variety of “tastes” and features. Front and center will be the multi-window support. Also, Google is bringing a better Doze functionality.Then there’s the seamless auto-update, which allows the operating system to download Android core level updates in the background and install them when you restart.

Check out the video of the Android Nougat statue unveiling, then let us know what you think about the naming scheme.

You can now watch out for the OTA updates of Android 7.0 Nougat on your Android devices. If your Android phone is among the eligble devices, you should see the update soon.

الخميس، 30 يونيو 2016

10 Cool Stuffs to Enjoy After Rooting Your Android Phone

This is a guest post compiled by Viktor for Shelaf.com 

Hey, Android is here to stay and most people are constantly moving over to the google powered Smartphone. Android is super flexible thanks to its open-source nature. Android developers are always pushing to do the unthinkable with Android and this leaves us as the users in an ocean of possibilities with the Android software.

You're being here either one of this two reason, you just rooted and looking for what to do or you are thinking about what to expect and the benefit from rooting your Android Phone. The important thing is that rooting your phone is best that could happen to your phone.

Rooting is majorly granting the Superuser permissions to your phone, that is being your own designer. There are many uses of rooting, IMEI being one of the most popular, but don't limit yourself to only that, as I did :-) . Explore new things. Now let's begin, you can root your phone using different apps like Kingroot, Framaroot, Root Genius and Towel Root etc; but then after that what next and that's what we'll be talking about here.

1. CHECK ROOT STATUS:
Yeah, as surprising as it may sound you actually have to check your root status. This can be carried out by any of the numerous amounts of root checkers available on Google Play Store.

Now that you have confirmed that your Android Smartphone is rooted you can move over to the next stage.

2. REMOVE BLOATWARE
Bloatware is system apps that are not of any particular importance to you, all they do is occupy USEFUL space. With the power granted unto you by rooting, you can now uninstall that bloatware. While doing this you are advised to take it slow and pay EXTRA attention to those apps that you are uninstalling to avoid uninstalling the important apps, that is apps that are required to any degree for your phone to perform some tasks. There are so many apps that help perform this  functions, one of them is the King User app another is Lucky Patcher, I think Du battery saver and Clean Master do this.

3. INCREASE RAM
Although the problem of  RAM size is continually reducing, there are still some guys that need more RAM. Well, now your RAM salvation has come, with the power vested in you by rooting, you are now able to increase your RAM by allocating some part of your storage space through partitioning to be used as a Virtual RAM, thus increment of your RAM. There is only one dark side to this, make sure you don't remove or unmount the storage device in use without turning off the app you are using to expand your RAM. Now Enjoy your MIGHTY RAM.

4. EXPAND INTERNAL STORAGE:
I know many people no longer experience this problem of not having enough space to install those apps you love just because your internal storage. But nevertheless it's still a problem some people experience, intact just so that you don't resort to rooting your to expand your internal storage many phone producers have made it possible for you to install apps on your SDCARD but that work for all apps because there are apps that need to be installed to internal storage to enjoy the best out of it. With the help of some apps, like LINK2SD, and of course rooting it possible, so why don't you try it out.

5. INSTALL CUSTOM RECOVERY
You should be asking yourself "WHAT IS A CUSTOM RECOVERY MODE". Well your phone already houses a recovery mode, although for some phones you have to do some things before you can access your recovery mode, but you can't do some wonderful stuff on it like install flashable zip files, which by the way are modifications like custom ROM to your system that you can install, without verification files. With the aid of custom recovery modes like CWM(ClockWork Mod) and TWRP, you are able to those things. There are also many other benefits of installing a custom recovery. Like: A denser android back, factory reset, and data cache wipe, as talked about before the ability to install custom ROM and flashable zip files.

6. INSTALL CUSTOM ROM
That's right... There are many things I'm sure you don't love about your phone like the user interphase, android version or numbers of junk bloatware. A custom ROM is just an unofficial update for your phone and you install by yourself. There are different ways you can install a custom ROM like as stated above by using a custom recovery, or you could install it using ADB, meaning Android Debug Bridge, through a computer. There are different benefits involved in flashing(installing) a custom ROM, for example, you can upgrade your Android version  if it's officially not available for your phone.

7. OVERCLOCKING YOUR DEVICE
This is not new for some of you here but for some others, it's a complete mystery for others... Overclocking your device means that you are overclocking your processor which in turn increases your processor speed. Right now you'll probably be thinking, why will I need this, well some people need their phones to be faster than they are normally but the phone can't attain that speed always and sustain it. I'm not saying you can upgrade your processor speed, but that you can just make your phone faster than it normally is but like everything in life it comes at a cost which is that it can cause overheating, and even decrease the lifespan of your processor. For this I strongly recommend that you find out more and understand it, as overclocking is not for beginners, it might even brick your phone not done properly. You can make use of CPU TUNER if you want to go ahead with it.

8. INSTALL COOL THEMES
We should all know about this from our experience with JAVA phones. Some people will say, can't I do this with launchers? My answer is YES, YOU CAN, but have you ever tried to see the amount of RAM those LAUNCHERS take. Unlike launchers, installing themes doesn't take your RAM, instead, it changes the designs, arrangement and look in total down to the system levels whilst preserving your Android version and a bunch of other things. For those that like flaunt your stuff, you can boast about the look of the phone to your friends. This function is one of the many functions of ROM MANAGER.

9. CHANGE BOOT ANIMATION AND BOOTING AUDIO
Your boot animation is the set of pictures shown when booting your phone, while the boot audio is obviously what you hear. Won't it be nice to gain the ability to alter these things? well, now you can with your rooted Android phone. You either manually (not advisable unless you know what you're doing) or with the aid of an app like ROM MANAGER.

10. INSTALL FONTS
Who won't love to set a font of his/her choice shown on his phone? You can change the fonts installed on your phone to a countless number of fonts available on ROM MANAGER or on any other font changer.

NOTE: Remember that while enjoying your phone at its peak you should backup your phone in case anything goes wrong.

Thanks for reading my post as crappy as it is and ensure to share if you learned one or more new things! Else, just comment and say good work!

I'm Viktor, a content creator/moderator at jackobian.com forums where I share the little I know while developing myself. You can check out my profile @viktor

الثلاثاء، 28 يونيو 2016

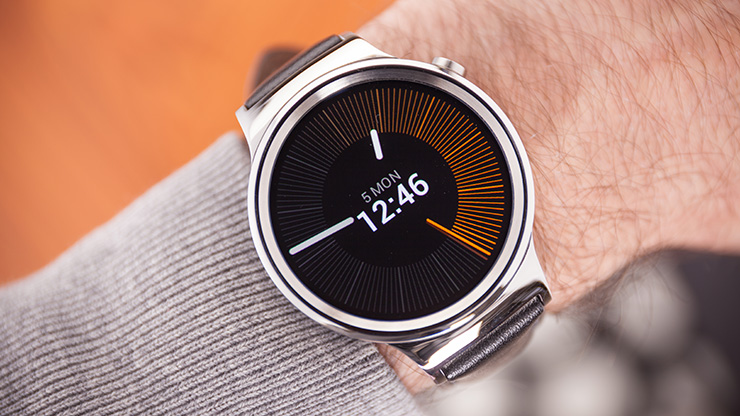
Installing Marshmallow Custom Rom On Huawei Watch


Huawei Watch now has Marshmallow custom rom, thanks to xda member, negamann303. Some features of this rom:

Features 
Based On MWD69 - Wear 1.5
Rooted
Busybox 1.25.0
Many System Apps Moved To /data For Easy Uninstall
Added Root Essentials, ES File Explorer And Wear Keyboard
Updated Gapps, Hangouts, Fit, Maps, Music

How to install Huawei Watch Marshmallow Rom

Downloads


Flashing Rom
  • Push rom to /sdcard/
adb push Huawei-Rom-NX-v1.1.zip /sdcard/Huawei-Rom-NX-v1.1.zip
  • Reboot Watch to recovery mode (learn http://pinkberrylicious.blogspot.com /2016/06/how-to-install-twrp-302-recovery-on.html" target="_blank">how to install TWRP)
  • Make a backup of your /data partition. It will be erased when rom is flashed.
  • Flash rom in TWRP and reboot to system
  • Done.


If your Watch's battery drains faster than usual, run this command via ADB

adb shell setprop ro.hwc.is_delta_panel false


If you've got any questions or comments, post below.

How To Install TWRP 3.0.2 Recovery On Huawei Watch

If you own a Huawei Watch and you're looking to install a custom recovery so you can easily flash custom roms and other 'flashables' :P on your smart-watch, TWRP is here to help you out.

Team Win Recovery Project (TWRP) has been ported to Huawei Watch. You can now flash custom roms, etc on your watch with ease.

How to flash TWRP on Huawei Watch

adb reboot bootloader

  • Copy downloaded TWRP recovery file to your fastboot directory and rename to recovery.img.
  • Launch Command prompt from the directory. (Shift + right-click, then select Open Command Window here)
  • Once in fastboot mode connect Watch to Computer via USB and run the command below to flash TWRP
fastboot flash recovery recovery.img
  •  Done.
Screenshot..


Share your thoughts. Post in comments section below.

[Fixed] PMT Changed for the rom: it must be downloaded in SP Flashtool


Sometimes when you try flashing sock firmware via SP Flash Tool you get this error: PMT changed for the rom: it must be downloaded but don't know how to fix it. In this post you'll learn an easy fix for this.

Fixing PMT Changed for the rom

  • In SP Flash Tool interface, click Format tab
  • Once in Format tab, click Start to format the phone
  • Now go back to Download tab 
  • Load scatter file of the firmware you wish to flash
  • Click Download and connect phone.
  • Flashing should now commence.

Alternatively, you can watch the short Youtube video below to learn how to fix the above error...


Doesn't solve your flashtool error? http://pinkberrylicious.blogspot.com /2016/09/sp-flash-tool-errors-and-how-to-easily.html" target="_blank">Click here to view other errors and how to fix them.

How To Create Mediatek (MTK) Scatter File in seconds

Create mtk scatter file

If you want to create scatter file for your Mediatek device which can be used to flash stock firmware, follow this simple and straight-forward guide.

Creating MTK Scatter File


  1. Launch MTK Droid Tools
  2. Enable USB debugging on your phone then connect to Computer
  3. Once Droid Tools has completed loading your phone's details, click Blocks Map
  4. Then click Create Scatter file
You can also watch the short video below to learn how to create Mediatek (mtk) scatter file...


الأحد، 26 يونيو 2016

Collection Of All Itel Feature Phones Stock Firmware


This is a collection of all Itel Feature Phones stock roms / firmware files. Download your device specific firmware from below and use the guide provided at the end of this post to flash. If the firmware file you seek is not on this list, use the comment section to inform.


How To Flash
To flash Itel Feature Phones stock firmware file on your phone, http://pinkberrylicious.blogspot.com /2015/11/how-to-flash-stock-rom-firmware-on-any.html" target="_blank">click here to learn how.

Download Software Update Tool (SUTLR) For Android

This Software Update Tool (SUTLR) v1.8.2 download link. This tool is used for flashing Android stock firmware files. Download from link below...


Software Update Tool (SUTLR) - Download

الجمعة، 24 يونيو 2016

Collection Of All Intex Android Phone / Tablet Firmware Files

This post contains a comprehensive collection of all Intex stock firmware files and their flashing guide. If you discover that your phone's firmware file is not contained in this list, inform me via the comments section and I will include it.

Downloads


  • Intex Aqua Wonder Quadcore    - Download


  • Intex I-Buddy Connect 3G    - Download

  • Intex I-Buddy Connect II 3G   - Download


How To Flash
To flash this stock firmware package is very simple and easy. http://pinkberrylicious.blogspot.com /2016/03/easy-mtk-firmware-flashing-installation.html" target="_blank">Click here to learn how to flash the firmware after downloading

الخميس، 23 يونيو 2016

Huawei Mediapad 7 Lite Stock Firmware Download


This firmware package is meant specifically for Huawei Mediapad 7 (S7-931u). Flashing on any other device will get it bricked.

Download


How to flash
  • Download the firmware package from above link.
  • Power off the device
  • Extract and copy the dload folder to the root of an external sdcard
  • Insert the sdcard into device and press Power button to boot normally.
  • The flashing process will begin automatically.
  • Wait for it to complete.
  • Done
For other Huawei firmware download, http://pinkberrylicious.blogspot.com /2016/02/collection-of-all-huawei-android_21.html" target="_blank">click here for tablets and http://pinkberrylicious.blogspot.com /2016/02/collection-of-all-huawei-android_29.html" target="_blank">here for smartphones.